Followers

Friday 18 December 2015

Mrs Naughty Claus


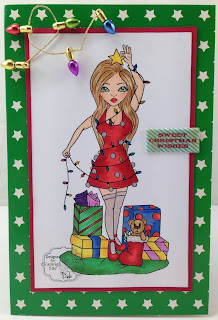
Hi everyone its not long till Christmas now, today Im sharing a card that Ive made for my husband for Christmas using the sexy Mrs Naughty Claus from Karleigh Sue Designs. To make my card I started off with a printed Christmas card blank and then added a Kaiser Journal card. I coloured my image with copic markers and then cut her out and popped her up with double sided foam tape. To embellish I used some glitter glue and christmas coloured sequins. Inside the card it reads ( is you ).
Here is the list of the colours that I have used.
E000,E00,E01,E21,E23,E25,G02,G03,G05,G09,R20,R22,R24,R27, and a gold gel pen.
To get this awesome image here is the link Mrs Naughty Claus

Monday 14 December 2015

Home Cooked Hottie


Hi everyone today I'm sharing a card that I made using the uber cool digi Home Cooked Hottie by Karleigh Sue Designs.
This is such a versatile digi, you could use it to make an anniversary card, birthday card, Christmas Card and Mothers day card.
To make my card I started off with a red square card base then I used some cooking paper that I got ages ago in a craft magazine. I also used a circular chipboard referencing families that I had in my stash and some little heart chipboards.
I coloured my digi with copic markers cut her out and popped her up with double sided foam tape inside the chipboard circle.
Here are the copic markers that I used to colour with:
w0,w1,w3,c1,c2,c3,c4,c6,y21,yr21,yr23,bg11,bg13,e31,e33,r22,r24,r27
To find this awesome image here is the link Home Cooked Hottie


Wednesday 18 November 2015

Bedtime Mouse


Isn't this little mouse known as Bedtime Mouse over at Rick St Dennis MFA so adorable?
I just had to make a card with him. Look at those cuter than cute cat slippers he is wearing.
To make my card I started with a nay blue card base I then matted with yellow and then with a starry paper that I had in my stash I think from memory  may have got it from Big W. I then print my mouse out and coloured him with copic markers. I fussy cut him out and popped him up with double sided tape. To embellish I punched out a star and attached it to the card with twine. I added a wishes sentiment and a yellow gem to finish off.
The colours that I used are:
Y11,Y13,E50,E53,E55,C1,C2,C3,C4,R00,W0,W2,W3,YR23,YR27,B60,B63
To find this adorable mouse here is the link Bedtime Mouse
You may also want to look at some of the other wonderful inspiration on Sparkle and Glitter Blog

Monday 16 November 2015

Lighting up Christmas


Christmas is fast approaching and today Im sharing the Christmas Spirit with the adorable digi Twinkle Twinkle by Karleigh Sue Designs.
To make my card I have started with a stary base card then I put a red matt down. I printed my digi out and coloured with mostly copic markers but I used glittery gel pens for the christmas lights so that they would sparkle. I then attached my image to the red matt. To finish off I added some mini christmas light decorations and a sticker sentiment.
The copic markers that I used are:
E000,E00,E01,R20,B60,B26,B23,R22,R24,R27,G3,C7,V05,V09,E35,E31,E33,Y17,Y13
To see some more awesome Karleigh Sue Inspiration here is the link Karleigh Sue Inspiration Blog

Sunday 15 November 2015

Progressive Challenge November for Rick St Dennis MFA


Hi everyone, In Cairns Australia its really heating up so I thought Id share a summery creation with you for the Rick St Dennis progressive Challenge. Ive chosen to make a card using Helen's Mice July.
All the Rick St Dennis mice are awesome. 
To make my card I started with a chevron patterned base card because I thought it looked like water. I then matted in red. I printed my image out twice and coloured with copic markers. I fussy cut one of my images and popped it up with double sided tape. I then made a speech bubble and wrote the work hi in stickers. To finish off I added some gem droplets that I got from spotlight.
The colours that I used are:
C1,C2,C3,C4,Y13,Y17,R22,R24,R27,R00,B80,B24,B01,B21,B26
To find this awesome image here is the link Helens Mice July
To see all the other design teams projects for the progressive challenge here is the link

Saturday 14 November 2015

colouring


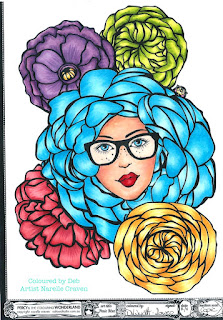
Hi everyone I just wanted to share some recent colouring that I have done that Im proud of, saying that I still have room for improvement. The first one is by artist Bennett Klein and the other is by artist Narelle Craven.

Wednesday 4 November 2015

Thanks a Latte


Hi everyone today I have some Autumn (Fall) inspiration for you with the lovely digi stamp called Pumpkin Spice Latte by Karleigh Sue designs. Quietly between me and you Im really happy with how my colouring turned out. To make my card I started with an orange base card then matted with red and a leafy patterned paper from Stampin Up. I then added some ribbon and an antique brad from Stampin Up. I made the sentiment myself using the computer. I printed out my pumpkin spice digi and coloured with copic markers I then cut her out and popped her up with double sided foam tape.
Here are the colours that I used:
E000,E00,E01,R20,YR21,YR23,YR27,R22,R24,R27,B06,B60,C7,W0
To find this gorgeous digi stamp here is the direct link Pumpkin Spice Latte
For loads more Karleigh Sue inspiration check out the Karleigh Sue Inspiration Blog

Saturday 17 October 2015

Lets Get Physical


Lets Get Physical, Physical I can't stop singing that lol!
Today Im sharing a card that I made with the Karleigh Sue digi stamp Work It Baby
Isn't she cool! I think this is going to be a valentines card for my hubby (I'm blushing)
To make my card I started with a blue base card and then matted in red. I then found a gym background on google images and printed it out. I then printed out my image and coloured with copic markers. I cut this baby out and popped her up with double sided foam tape. I found the sentiment on google and thought it was perfect. I added some gems to finish off.
The copic markers that I used are:
E000,E00,E02,E01,Y21,YR21,YR24,B12,B14,RV14,RV17,RV19
To find your own copy of Work it Baby here is the link Work It Baby
And for loads of Karleigh Sue inspiration here is the link for their blog Karleigh Sue Inspiration blog

Friday 16 October 2015

Lolita


Hi Everyone today I want to share with you a card that I made with the ever so gorgeous Karleigh Sue digi Lolita.
I made this as a Just for You card but I think that Im going to give it to a special friend for her birthday.
To make my card I started with a purple card blank I then matted with silver mirri card and then with a background that I bought from Crafts You Print. I printed out Lolita and coloured her with copic markers I then cut her out and popped her up on the background. To finish off I added my sentiment and a couple of gems.
Im really happy with how this card turned out.
The colours that I used are:
E000,E00,E01,R20,Y21,YR24,RV14,RV17,V12,V15,V17,B12,W1,W3
Heres the link so you too can have this awesome digi Lolita
There is some other fantastic inspiration over at the Karleigh Sue Inspiration Blog

Thursday 15 October 2015

Crystal


Hi everyone, I thought that Id have a go at a Make it crafty challenge. Ive made a card using the ever so pretty digital stamp called Crystal. 
I started my card by using a purple base card I then matted it with blue card stock and then with watercolour paper which I did some brush strokes on. I coloured Crystal with copic markers and then cut her out and popped her up on the water colour paper
the copic markers I used are:
E000,E00,E01,R20,R22,R24,R27,V12,V15,V17,G43,G46,V21,YR21,YR24,B21,B23,B26
Heres the link to Crystal
Im entering this in the make it colourful challenge over at make it crafty

Alice


Hi everyone for the progressive challenge this month we were given a wonderful colouring page from Rick St Dennis MFA of Alice in Wonderland.
I made my colouring into a card by printing it to fit on a blue card base. I then matted with red and then a clock paper from Kaiser Craft.
I printed my colouring sheet out twice so that I could pop Alice up. The background of the colouring was done using an assortment of markers that I have at home including some neon ones. Alice was coloured with copic markers then cut out and popped up with double sided foam tape. To finish my card off I added a gem and the sentiment 'wishes'
The copic markers that I used are:
E000,E00,E01,R20,R32,R35,B12,B14,B18,B93,W1,W3,E50,E53,Y21,YR21,YR24
To get your own Alice to colour here is the link Alice
Also don't forget to check out all the other creations on the Sparkle and Glitter Blog


Thursday 1 October 2015

Ahoy Matey


Ahoy Matey! Shiver me timbers this is an awesome digi by Karleigh Sue Designs she is called 
Hawt Captain. I thought that I would do something a bit different to a card, so I made a door hanger.
I started with some white card stock and traced a door hanger that I had at home on to it. I then covered it with some wood grain paper from Kaiser craft. I then die cut the hole in the top.
I printed out Hawt Captain and coloured her with copic markers (Im pretty chuffed with my colouring in this project). I then cut her out and popped her up with double sided tape. I added a blackboard speech bubble and embossed ahoy matey in white. 
Here are the colours that I chose.
E31,E35,E39,W0,W2,W3,Y00,Y04,Y08,V22,V25,V28,G05,G09,R20,R22,R24,R27,C6,C9,B95,
E000,E00,E01
Heres the link for this awesome image Hawt Captain
Theres loads more inspiration over at the Karleigh Sue Inspiration blog

Tuesday 29 September 2015

ChrisMouse


Hi everyone for my inspiration post Im getting into the Christmas spirit with the adorable Rick St Dennis MFA digi stamp Chrismouse cute huh!!!!
To make my card I started off with a red card blank, and then mounted it with a kaiser craft journal card. I then printed out Chrismouse and coloured him with copic markers and cut him out and popped him up with double sided foam tape. To finish off I added some gems to the holly on his hat, a chipboard sentiment and some sequins in Christmas colours.
The colours I used are:
R00,R01,R22,R24,R27,C0C2,C3,C4,W0,C14,G16,Y04,Y08,V17,B21,B24,B26,V12,V15
So that you too can find this adorable image here is the direct link ChrisMouse
For loads more Rick St Dennis inspiration check out the sparkle and glitter blog


Wednesday 16 September 2015

Hot Zombie


Halloween is just round the corner so there is some awesome new Halloweeny digs over at Karleigh Sue. This one is called Hot Zombie isn't she spooktackular! To make my card I started with a purple base card and then matted with green (Halloween Colours) I then used a paper by Kaisercraft from the 13th hour collection and distressed it. I then die cut a circle out of yellow and embossed so it looked like the moon. I printed out Hot Zombie and then coloured her with copic markers I then cut her out and then popped her up on the moon with double sided foam tape. I added a Halloween sentiment and some bat stickers to finish off.
Heres the list of copic markers that I used to colour her.
YR00,YR15,Y518,BV01,BV04,BV08,B60,B63,YG00,YG23,YG25,G07,W0,W1,W2,W3,R20,R22,R27
For loads more bewitching inspiration check out the Karleigh Sue Inspiration blog

Tuesday 15 September 2015

You Keep Me Anchored


Hi everyone! Today Im sharing a make using the awesome 50 Shades of Blue by Karleigh Sue Designs. I loved loved loved colouring this. To make my card I started with a green card blank and then matted with a razzelberry card stock that I used a border punch on. I then used a background from craftsuprint. I embossed it with a sentiment. I printed my digi out and coloured her with copic markers. I then cut her out and popped her up with double sided tape. I added a gem and a little starfish to embellish.
Here are the colours that I used:
E000,E00,E01,R20,E55,E57,E59,BG10,BG11,BG13,E31,E35,B02,B04,RV02,RV04,C1,C2,C3,C5
Heres the link to this fantastic image 50 Shades of Blue
Also go have a look at all the other inspiration at the Karleigh Sue Inspiration Blog

A Noah"s Ark Baby Card


Hi everyone! Heres my make for the Rick St Dennis MFA Progressive challenge.
Ive used the amazing Noah digi Stamp. I thought that it would make the perfect baby card.
To make my card I started with a square cream card blank and then matted with plum card stock, and then a purple check paper that I had in my stash. I chose purple and yellow colours so that it could be used for a baby boy or baby girl. I then die cut a shape out of plum and then out of a yellow paper. I stitched around my papers with my old clapped out sewing machine. I printed out the Noah digi and coloured with copic markers. I then fussy cut it all out which took a fair bit of time and popped it up with double sided foam tape. I finished off with yellow ribbon and beads that spelt baby.
Here are the colours that I used:
B23,B26,BG53,BG57,BG72,BG75,R11,YR21,YR24,YR20,W0,W2,W5,W7,C1,C3,C5,E13,E11,E53,C6,C2,B91,B95,B12,B14,YR16,E34,E31,YR68,E57,E59,E000,E01,E55,E35
To find this lovely and very versatile digi here is the link Noah
For more progressive challenge inspiration check out the Sparkle and Glitter blog

Monday 14 September 2015

Celebrate


Hi everyone I just wanted to share a colouring in that I did. I used Cheri Shull's birthday bash freebie. I printed it so that it was the right size to mount onto a card as Id like to send it to a friend for their birthday. It took awhile to colour but I enjoyed every bit of it. I used Prisma Pencils that I was lucky enough to win. I can't wait to do more colouring.

Saturday 12 September 2015

Having a Hoot of a Christmas


Hi everyone here is a decoupage Christmas card that I made. I used decoupage that I got in a magazine last year (and only now have had a chance to do) The decoupage is Mulberry Woods isn't cute. To make my card I started off with a gold card base and then matted it with papers that I also got with the magazine. I built the decoupage using a double sided foam tape and added it to my card using a red matt. I added a sentiment a glitter gem and some holly. To finish off I used some glitter glue to add some christmas sparkle.

Im adding this to A Snowflakes Promise challenge which is a Winter/Christmas theme

Wednesday 26 August 2015

Cuppa Time - Karleigh Sue Designs Blog Hop


Yay! We are having a birthday blog hop for Cheri, The artist at Karleigh Sue Digi Stamps!
this also celebrates the first YEAR of Karleigh Sue Digis (where has the time gone?)
to mark the occasion, we are blog HOPPING using our favourite images drawn during this period at KS!
The Blog hop starts HERE Karleigh Sue Inspiration Blog should have reached my blog from Rose
where you will have seen her gorgeous creation!
now you are on Deb Vee's Craft Place blog and I have made a card


using Cuppa Time
I love love love this Karleigh Sue Image as its so versatile for so many occasions.
To make my card I have started with a red base card and then matted with blue. I have then used a paper with Tea/coffee images that is from First Edition's Man Made Collection (I got it from Lincraft). I then used some adhesive lace and die cut a circle out of blue card stock. I coloured my image with copic markers and then fussy cut her out and popped her up with double sided foam tape. I added a sentiment and a little teapot button.
The colours that I used are:
R22,R24,R27,C2,C4,C7,W1,B4,B6,E000,E00,E01,R20,Y19,E31,E35,E71,E74,E77,E79
next up on the hop is Bettina
don't forget to visit all the people on this hop list, and if you leave a comment on EACH ONE you could be in the running for a special prize in the prize draw!
*drawn at random from everyone who has commented on ALL blogs
In case you joined me here , or you have gotten lost, 
here is the full blog hop list!

Inspiration Blog - Start Here!

Saturday 15 August 2015

August Mouse


For this months progressive challenge Rick St Dennis MFA gave us a really cute project to colour called August Mouse. 
To make my card I started with a square black card blank, and matted it with red then with a travel paper from Kaiser Craft.  I printed the August mouse out twice and coloured both so I could fussy cut it out and pop my mouse up with foam tape. 
I then used some Kaiser collectables and some red gems to finish off.
The colours that I used are:
R22,R24,R27,V6,V9,Y13,Y17,YR04,E33,E35,E37,R00,W0,BG45,BG49,B12,B63,B60,C1,C2,C3
C4,C6
Heres the link for the August Mouse stamp August Mouse
To see some great inspiration from the Rick St Dennis team head on over to the sparkle and Glitter blog

Saturday 8 August 2015

Archie


Introducing Archie another one of Rick St Dennis MFA's Blokes.
To make my card I have started with a white square card blank and stamped Happy Father's Day in red ink up in the top left hand corner. {This can be such a versatile stamp just by changing the sentiment to Happy Birthday or Bon Voyage for instance} I then drew a border around the card with a black fine liner pen. I then printed out Archie and coloured hime with copic markers. I then fussy cut him out and popped him up on the card with double sided foam tape.
To find Archie here is the link to him Archie
For lots more inspiration why not check out the Sparkle and Glitter Blog

Friday 7 August 2015

Bertie Happy Fathers Day


I love the series of BLOKES over at Rick St Dennis MFA. Today I'm sharing a card that I made using Bertie.
To make my card I started with a square white card blank and stamped the sentiment Happy Father's Day in the top left hand corner in red ink. I then drew a border around the card with a black fine line marker. I printed out Bertie and coloured him with copic markers and then fussy cut him out and popped him up onto the card with double sided foam tape.
To find Bertie her is the direct link to him Bertie
For loads more inspiration heres a link for you to check out The Sparkle and Glitter Blog

Thursday 6 August 2015

Be True to who you are feat. Bring it on Baby


Today Im sharing a card that I made using the Karleigh Sue digi Bring It On Baby, I love Karleigh Sue dig's as they have attitude. To make my card I started with a square red base card then matted it with a paper from Kaisers Scrapyard collection. I distressed the edges of the paper as I wanted a grungy feel. The sentiment and the stars are also for Kaiser Craft. I printed out my digi stamp and then coloured with copic markers and cut her out and popped her up with double sided foam tape
Here are the colours that I used:
E33,E35,B34,B37,R22,R24,R27,E000,E00,E01,R20,C3,C5,C7,C9
To get your hands on this awesome digi here is the link Bring it on Baby
For some great inspiration don't forget to check out the Karleigh Sue Inspiration Blog

Thursday 16 July 2015

Mummy Kissing Santa


Its Christmas in July over at Karleigh Sue and there are some awesome New Releases. Im using Mommy Kissing Santa.
To make this jolly card I started with a red card blank and then matted it with 2 papers from Kaiser Craft. I then printed my image out twice and coloured with copic markers . I cut my images out and popped them up with double sided tape. To finish off I added a Karleigh Sue sentiment a silvery pompom on Santas hat and a set of lips sticker that came from Lincraft.
The colours that I used are:
B12,B14,B16,B18,E000,E00,E01,R20,R22,R24,R27,R29,YG61,YG63,YG67,W0,W1,W3,C0,C1,C2,C4,C5,C7,E50,Y21,E33
Don't forget to check out the other festive inspiration over at the Karleigh Sue Inspiration blog

Wednesday 15 July 2015

Lets Go Team


Heres an awesome image called Lets Go Team by Karleigh Sue Designs, and how cool for footy season! Seeing that I live in Cairns Ive gone for colours that are used in the Cowboys NRL team.
To make this card I have started with a kraft card blank and then matted it with a grass paper and then football sayings paper from Kaiser craft. My banners that have been stapled to the top have also come from Kaiser Craft. I coloured our team gal with copic markers and then cut her out and popped her out. To finish I stamped a party sentiment and cut it out and popped it up too.
The colours that I used are :
E13,E15,E18,E50,E33,E35,Y15,Y17,B21,B24,B26,E000,E00,E01,R20
To have your own Footy gal here is the link Lets Go Team
To kick a goal with some more inspiration check out the Karleigh Sue Inspiration blog

Happy Anniversary


Ive got an Anniversary coming up and I thought that this image by Rick St Dennis Mfa would be perfect. Its called Morning on Valhalla, and its a new RSD image.
CAS cards are one of my favourite layouts as I love the image to be the hero.
To make my card I started off with a red card blank then matted it in blue and then with a paper from Kaiser Craft. I drew a border around the card using a thin black marker and I stamped the sentiment Happy Anniversary. I printed my image out twice so that I could pop it up with foam tape. I coloured using copic markers. For finishing touches I put tiny pompoms on slippers and put some glitter on the hearts that are on the boxer shorts.
Here are the colours that I used:
E000,E00,E01,R20,RV10,RV13,RV14,W0,W3,C2,C4,C5,B60,E35,E31,E57,E33,R24,B12,B14,E55
To find this image here is the link Morning on Valhalla
Don't forget to check out the other work by the team on the Sparkle and Glitter Blog

Tuesday 14 July 2015

Dave the Diver Fathers Day


Hey ya everyone today I'm sharing another one of Rick St Dennis's Blokes. This digi is Dave the Diver and I have made him into another Fathers Day Card.
I started with a square white card blank stamping Happy Fathers Day on it in red ink and then drawing a border around the card with a black marker.  I then coloured Dave with copic markers and then cut him out. I popped him up with double sided foam tape. For a bit of fun I added some goggly eyes on the swim ring.
Here are the colours that I used:
B60,E000,E00,E01,R20,W0,W2,C4,E57,B01,B04,YR16,YR18,R22,R24,Y04,Y08
To find Dave the Diver here is the linkDave the Diver
For loads more creations check out the Sparkle and Glitter Blog


Monday 13 July 2015

Bad Science Birthday


Hi everyone today Im using the Rick St Dennis MFA image Bad Science. I decided to make it a birthday card. I started by printing out my image and colouring it with copic markers. I then added some staples and popped it up onto a fluro green shape {I got a packet of these shapes from a cheap shop they are normally used as promo tags}. These were put onto a purple starry base card. Awhile back I bought some cheap plastic test tubes on ebay, they turned out to be smaller than what I thought they were going to be so they have just been sitting in a cupboard in my craft room, until this project. I put black dots on little white pompoms {trying to make them look like eye balls} they have moved in the tube so its hard to see. I then used black sticky letters to write on the test tube I then stuck the tube on the card with double sided tape to finish.
The colours that I used to make this card are:
w0,w1,w2,w3,w7,e00,e35,e79,y00,y26,b60,b63,c4,r000,r30,r56,r59,g000,g02,g07,g09
To find this image here is the link: Bad Science
For some more inspiration why not check out the Airless Chambers Blog

Fathers Day Clive


Have you seen all the new blokes over at Rick St Dennis Mfa? Today Im sharing one of them named Clive. These digi stamps are so versatile for many occasions. Ive made mine into a Fathers Day card. Ive done my usual CAS style as I wanted the image to really stand out. To make my card I started with a square white card blank. I stamped a Fathers Day sentiment in red ink and drew a border around the edge of the card with a black marker. I coloured clive in with copic markers and then fussy cut....yep it was fussy cutting especially around that little daffodil. I then popped it up with double sided tape for dimension.
The colours that I used are:
E000,E00,E01,R20,Y04,Y08,B02,B04,E77,E79,G17,G29,R22,R24,R27,B34,B37,W0,W2,W5,C2,C4
C5
To find this stamp here is the direct link Clive
For loads more talented inspiration here is the link to the Sparkle and Glitter Blog

Saturday 11 July 2015

Genie Wishes


Hi everyone today Im sharing a new Karleigh Sue stamp with you called Genie, isn't she gorgeous!
To make this card I started with a glittery gold card blank and then used a pre made card that had a black board panel on it. I white embossed happy birthday onto it. I coloured my genie with copic markers and then cut her out and popped her up with double sided tape. To finish I added some gold ribbon, a couple of gems and a teapot button.
Here are the copic markers that I used:
E000,E00,E01,R20,E33,E35,C3,C9,B39,RV09,BG10,BG11,BG13
To make your own genie here is the link to her Genie
For loads of great Karleigh Sue Inspiration why not check out the blog Karleigh Sue Inspiration Blog

Thursday 25 June 2015

Pansy Fairy


While looking through Rick St Dennis's Zibbet shop {which I might add is something I love doing} I found this gorgeous Pansy Fairy. Isn't she pretty. I coloured her with copic markers and then fussy cut her out and popped her up with double sided tape. I added some kindy glitz to her wings for a bit of sparkle. I started with a purple base card then matted in blue. I then used a pansy paper that I got from Crafts U Print and a pansy decoupage that I also got from crafts u print. I also used a paper doily that I had in my stash as well as a little sentiment saying Especially for You.
The colours that I used are:
E000,E00,E01,R20,E35,E31,V000,V04,V05,V09,E51,B000,BV08,BV02,BV04 AND G000
To find this really pretty stamp her is the link Pansy Fairy
For loads more inspiration check out the Sparkle and Glitter Blog

Saturday 20 June 2015

If Friends Were Flowers.......


I have some really wonderful friends and I like to make cards to send to them. In this case I have used the darling digi Summer Wind by Rick St Dennis Mfa. She has such a pretty face.
To make my card I started with a pale mint green base card and then matted in a purple. I then used a gorgeous paper from Wild Rose Studio that I got with a magazine. I coloured my girl with copic markers and then cut her out and popped her up with double sided foam tape. To finish off I stamped my verse that I got with a magazine and added some gems.  This is a typical Deb CAS card.
The colours that I used are:
E000,E00,E01,R20,RV02,V09.V05,V15,V17,YG17,YG67,Y08,E37,E35,E31,B24,B21,B26
To find this cuter than cute image here is the link for her Summer Wind
You may also want to check out some of the other great creations over at the Sparkle and Glitter with Rick blog


Demon Hoover


As soon as I saw this Demon Hoover in the Rick St Dennis Zibbet shop, I had to have it and make a card. Actually the sentiment I thought of came before I had even made the card. I made the sentiment just on my computer. I started with a square red base card and then matted it with a wallpaper type paper that I found in my stash. I distressed all the edges. I drew a black border around it in a fine marker. I coloured Mr Hoover with copic markers and then fussy cut him out and then popped him up with double sided foam tape. To finish off I added some flower soft for him to hoover up!
The colours that I used are:
C1,C3,C5,R35,R37,Y11,Y13,Y15,Y28,B24,B99
To find this demonic hoover here is the link Demon Hoover
For some more inspiration of the dark kind head on over to the Airless Chambers Blog

Friday 19 June 2015

Thats my Jam


The Karleigh Sue designs really rock the house. This digi is a newie and its called That's My Jam. This gal rocks doesn't she.
To make my card I started off with a pale pink base card and then matted it in a hot pink card stock. I then matted with a music paper from Kaiser Craft. I coloured my jamming gal with copic markers and then put a black and glitter gold frame over it. I added some hot pink gems and the sentiment U Rock to finish off.
Here are the colours that I used:
C2,C4,C7,C9,RV02,RV04,RV06,V12,V15,V17,B32,B34,B37
To find this rocking digi here is the link That's my Jam
for loads of sensational inspiration check out the Karleigh Sue Inspiration Blog

Im going to add this make to the Kit and Clowder Pink Challenge as well
http://kitandclowder.ning.com/challenges/june-challenge-pink


Tuesday 16 June 2015

Smokin' Hot


The new releases over at Karleigh Sue designs are Smokin Hot ! Heres one of them and its called Fire Rescue.To make this card I started with a purple base card then matted with red. I used google images to get a picture of flames and made it into my background for this project. I coloured my smoking hot gal with copic markers and then cut her out and popped her up with double sided tape. I also printed out a Karleigh Sue sentiment and popped it up as well. To finish off I embellished with a real match some orange ribbon and some red gems.
The copic Markers that I used are:
E31,E35,E37,C2,C4,C7,C9,R22,R24,E000,E00,E01,R20,R29,YR14,Y06,Y15
Also don't forget to check out the Karleigh Sue Inspiration Blog for some awesome inspiration and some more new releases.

Monday 15 June 2015

Tea-Rific


For this months progressive challenge we had this Tea-rific stamp to use called Mr Tea by Ricl St Dennis Mfa. 
To make my card I started off with a lime green card then matted it in orange and then again in a Kaiser Craft paper from the Candy Lane collection. I also used a doily from Kaiser Craft. I coloured Mr Tea with copic markers and I used a bright colour combo. I then fussy cut him and his little mouse friend out and popped them up with double sided tape. To finish off I got a real tea bag and made a new tag for it stamping the Tea-rific sentiment on it and buy adding a metallic star. With the tea bag inside who ever gets this card with be able to have a cup of tea as well.
The colours that I used are
BG01,BG05,BG07,Y06,Y08,YR12,YR15,W3,C2,C4,R00,R11,R29,V12,V15,V17
To find this image here is the link Mr Tea
Also why not grab a cuppa and check out the Sparkle and Glitter Blog

Saturday 13 June 2015

city shopping


Hello! Today Im showcasing a digi called Mommies Vacation By Karleigh Sue Designs. Isn't she a hip Mommy!
To make my card I started off with a square blank red card then I matted it with 2 papers from Bo Bunny. I distressed all the edges of the paper I then stuck a frame from Maggie Holmes on and added a wooden speech bubble from Studio Calico. I coloured our Mommy with copic markers and then cut her out and attached her to the frame.
The colours that I used are:
BV04,BV08,R22,R24,R27,W2,W3,E17,E19,B41,B45,B39,B16,B18,E000,E00,E01,R20,G5,G7,Y15,Y17,C7,C9,C2,C5,C4,E33,E35,E23,E27
To find this great image here is the link Mommies Vacation
To check out lots of other makes from the Karleigh Sue Design Team check out the Karleigh Sue Inspiration Blog

Friday 12 June 2015

Wish


Its been ages since Ive done a challenge mainly due to lack of time so I pushed to get one done this week. I decided to use Some Odd Girls - Genie Gwen.I started with a square purple base card then I matted it with a paper from Kaiser Crafts Botanical Odyssey.  I then used a cute sequin trim from my local craft store. I die cut some silver mirri card and a dotty paper from Kaiser Crafts Botanical Odyssey. I coloured Genie Gwen with copic markers and then fussy cut her out and popped her up with double sided foam tape. I stamped and embossed a wish sentiment from 7 Gypsys that I got on a magazine.
The colours that I used are:
v15,v17,bg23,yr23,yr27,bg09,b60,yr20,e31,b93,bg07,bg05,e35,e00,r20,e000,e01
and into the Some Odd Girl Face Book Challenge and linky party http://www.someoddgirlblog.com/

Thursday 11 June 2015

You Rock (n roll)


Hi everyone, today Im sharing a bit of rock n' roll with you. Im using the digi Poodle Skirt by Karleigh Sue designs. She rocks don't you think? To make my card I started with a pale pink base card and then matted it in blue. I then used a paper from Kaiser Crafts In the attic collection. I found a juke box on Crafts U Print, which I cut out and stuck down. I coloured Poodle Skirt with copic markers and then fussy cut her out. I embellished with some pom pom ribbon and the sentiment You Rock.
Wishing you all Happy Days
Hugs Deb xox
The copic colours that I used are:
e000,e00,e01,r20,rv000,rv02,rv04,r29,c2,c4,b60,b04,y11,y21,e53,b01
To find Poodle Skirt here is the direct link Poodle Skirt
For loads more inspiration bop on over to the Karleigh Sue Inspiration Blog

Tuesday 2 June 2015

Listen Hunni


Heres one of the many new digis over at the Karleigh Sue shop. This One is called Listen Hunni. This gal has attitude which I love and its that attitude that influenced how I made this card.
 I started off with a square red base card I then matted it with blue. I then used papers from Kaiser, The bricks are from the base coat collection and the graffiti is from their Attitude collection so is the sentiment Chillin'. I coloured hunni with copic markers and then cut her out and popped her up with double sided foam tape.
The colours that I used are 
E000,E00,E01,R20,E17,E19,B37,B39,C2,C4,C7,C9,B41,B45,R32,R35,R37
To find Listen Hunni here is the direct link Listen Hunni
Don't forget to check out some more awesome makes at the Karleigh Sue Inspiration Blog


Sunday 31 May 2015

G'day


G'day everyone. Today for my inspiration post Im sharing a card that I made using the uber cute Karleigh Sue digi Koality Time. (Im an Aussie and I just think this is so cute). I started with a red base card and then matted with white card stock. Then I used an Aussie paper from Bella as my background. I coloured my Koala Gal with copic markers cut her out and then popped her up with foam tape. I added some glitter lettering for my g'day work and some red and silver sequins
Here are the copic markers that I used 
C2,C4,C5,C7,C9,B26,B28,E33,E37,E35,E79,R22,R24,R29,R11,E50,YG23,YG67,Y06,Y08
For your own Koality Time here is the link Koality Time
For loads more inspiration why not check out the Karleigh Sue Inspiration Blog

Sunday 24 May 2015

The Rick St Dennis Tag contest


There is a tag contest over on the Rick St Dennis Facebook page and heres my entry using the RSD MFA digi Batcula. To make my tag I cut a piece of white card into the shape of a coffin. I then covered it with some wood grain paper from Kaisers Base Coat collection. I coloured BATCULA with copic markers and fussy cut him out and popped him up on the coffin with double sided tape. I added the wording and some twine to finish off.
The copic markers that I used are:
C2,C4,C5,Y00,R00,R11,R27
Here is the direct link for the Batcula digi Batcula

Tuesday 19 May 2015

Get Well Wishes !


Hi everyone! Heres a little darling by the name of Nurse Rozetta By RSD MFA sending you get well wishes! I made this card by starting with a black square card blank and then matted it in red. I then used a paper from Kaiser Crafts 13th hour collection. I coloured Nurse Rozetta with copic markers and then fussy cut her out and popped her up with double sided foam tape. I then added a bandaid sticker which I stamped my sentiment on, added some red sequins and some bakers twine to finish.
Here are the colours that I used:
W2,W3,W5,B60,B63,Y08,C2,C4,C5,R20,R22,R24,R29,E55,E57,E59,E000,E00,E01
To find this image here is the link Nurse Rozetta
For some more creepy inspiration why not check out the Airless Chambers Blog


Magic Happens


I love magical and mystical creatures and Rick St Dennis Mfa has that covered her has so many awesome digs. Today I have chosen to make a card out of his Unicorn. I started out with a mint green base card, and then matted in purple. I then added a glittery butterfly card from Kaiser Craft and added some lace. I then Die cut a purple circle and then another Kaiser Craft paper. I coloured my Unicorn and then fussy cut it out and popped it up with double sided tape. I added a sentiment and a couple of gems to finish off. Im really happy how this turned out, Im going to give it to my sister for her birthday.
Heres the colours that I used:
V12,V15,V17,G19,YR16,C2,C4,W1,R20,E33,RV02,RV04,B02,B04,B06,Y08
Here is the direct link to this magical image Unicorn
And for Loads of inspiration from the the RSD EDT check out the Sparkle and Glitter Blog

Sunday 17 May 2015

Ahoy Matey


Today for my inspiration post I'm using the nautical Ahoy Matey by Karleigh Sue. Isn't she swell lol.
I have coloured her with copic markers and then fussy cut her out and popped her up with double sided foam tape. I started with a red base card then matted it with white card and then a paper from Kaiser Crafts Sandy Toes collection. I die cut an anchor out of silver mirri card and used glitter sticker letters for the word Ahoy.
The colours that I used are:
E000,E00,E01,R20,E33,E35,E39,E53,B05,B24,B26,W1,R22,R24,R27,Y08
Here is the link to this sassy image: Ahoy Matey
For Loads more inspiration why not check out the Karleigh Sue Inspiration Blog

Saturday 16 May 2015

Ive gotta come clean


There are some awesome New Releases over at Karleigh Sue this month. I have used Save the Boobies! Ive coloured my gal with copic markers and then die cut my image then put a red frame around it. I have popped it up onto a Kaiser paper from the Base Coat collection. I started with a red base card then matted it with a black shimmer card. I printed my sentiment onto blue card and embellished with a mini peg.
The Copic Markers that I used are:
RV14,RV17,V06,V09,G17,G28,B60,B26,B29,E33,E35,R32,R35,R37,R20,E000,E00,E02,C1,C3,C5,C7,C9
For loads more inspiration why not check out the Karleigh Sue Inspiration Blog

Friday 15 May 2015

Just For You


Today for my Progressive Challenge over at Rick St Dennis MFA'S Sparkle and Glitter blog I have chosen Minnau the mermaid to make into a card. I already have someone in mind for the card!
I started off with a navy blue card blank and then matted it with a paper from Kaiser craft. I then die cut another Kaiser paper into a circle and stuck it down. I coloured Minnau with copic markers and fussy cut her out and popped her up using double sided foam tape. I die cut the words Just For You out of orange card and stuck them to the card, lastly I added a few sequins. 
The copic markers that I used are: E000,E00,E01,R20,C3,C5,C9,V12,V15,V17
BH13,BG15,B12
To find this gorgeous mermaid heres the direct link Minnau
For loads of inspiration from the RSD Elite Design team why not check out the Sparkle and Glitter Blog

Wednesday 29 April 2015

90th Birthday Orchids


A friend wanted a special card for her Mum's 90th Birthday she had the background paper which is from the Kaiser Damask collection and her Mum loves orchids. So this is what I came up with. I used  the stunning orchid digi stamp from Aurora Wings and coloured with copic markers. Im soooooo happy with how this came out to me this is a Personal Best card. I started with a shimmery black base card, matted in beige, matted in the Kaiser Damask paper matted in shimmery black card and then with beige paper. I used peel off stickers for the Happy Birthday, the name and the age. I also added stick on pearls. After colouring the orchids which I printed out 3 times I fussy cut them out so that I could pop some of the blooms up with double sided foam tape.
The colours that I used are 
YG00,YG67,YG63,R00,R81,R85

Im going to add this project to the Aurora Wings Flowers Challenge #14

Sunday 19 April 2015

Birthday Sweets


Heres a sassy digi from Karleigh Sue! Its called Birthday Sweets. With out meaning to this card came out Red White and Blue mostly, so its very patriotic plus I wanted it to be party like so I used glitter.
I started with a blue base card then matted in a red patterned glitter card. I also die cut bunting out of silver glitter card. I coloured this image with copic markers and added some kindy glitz to her party hat. To finish off I added some gems and a silver Party sentiment.
The copic markers that I used are:
E23,E27,Y23,B34,B37,R24,RV17,E53,Y17,E33,B39,R27,R20,E51,RV23,RV21,E02,E000,E00,C1,
R22.
To find this digi here is the direct link : Birthday Sweets
You might also want to check out the awesome Karleigh Sue Inspiration blog